Nee, dit is niet noodzakelijk.
Wanneer je veel vragen en/of antwoorden hebt dan is dit wel aan te raden.
FAQ Overzicht
Algemeen
Moet ik registreren om een vraag te kunnen stellen?
Auteur: Hendrik
Laatst bijgewerkt:2011-04-13 10:51
Hoe maak ik een referentie naar een website of boek in een verslag of rapport?
Auteur: Harry van der Pol
Laatst bijgewerkt:2013-09-30 13:52
Waar vind ik gratis boeken
Auteur: duivenbode
Laatst bijgewerkt:2012-09-17 16:16
U: schijf vanaf laptop NHL
Auteur: Hendrik
Laatst bijgewerkt:2015-12-10 14:39
AVR controllers
Vista 64 - bit problemen
Heb je problemen in AVR studio met de gcc / make programma's en ze komen overeen met de problemen zoals omschreven op de volgende link:
===
Cygwin heap problem
The first is the "Couldn't reserve space for cygwin's heap," error, such as:
AllocationBase 0x0, BaseAddress 0x71590000, RegionSize 0x30000, State 0x10000
C:\WinAVR\utils\bin\sh.exe: *** Couldn't reserve space for cygwin's heap, Win32 error 0
en/of
sync_with_child problem
This bug only seems to show up on Vista 64-bits and is caused by a bug in the CreateProcess API function used by MSYS/MingW (platform for some of the utilities in WinAVR). Symptoms are errors similar to:
0 [main] sh 4208 sync_with_child: child 4432(0x124) died before initialization with status code 0x0
37434 [main] sh 4208 sync_with_child: *** child state waiting for longjmp
===
http://www.madwizard.org/electronics/articles/winavrvista
Download dan het bijgevoegde bestand (dll in zip) en plaats deze op de juist locatie in de WinAVR map.
Auteur: Hendrik
Laatst bijgewerkt:2011-09-09 13:54
Volgorde problemen bij switch-case
Bij gebruik van een switch met 4 of minder elementen zal de compiler soms anders optimaliseren dan verwacht. Hierdoor kan de volgorde (die soms toch wel belangrijk is) worden aangetast.
Gebruik daarom 5 of meer elementen in een switch, of vervang deze door een if/elseif constructie.
Auteur: Hendrik
Laatst bijgewerkt:2011-09-09 13:59
Fout bij starten van AVR studio op schoolsystemen
Wanneer een fout over de residentagent.log verschijnt (zie figuur in bijlage) dan kan dit probleem verholpen worden door vanuit het start menu het volgende item te gebruiken:
start->programma's->ontwerp/design->atmel AVR tools->delete residentagent.log
Auteur: Hendrik
Laatst bijgewerkt:2011-09-21 11:55
In het wedstrijd document staat over 7. Het ravijn het volgende: "Deze elektrisch aangedreven inrichting". Houdt dit in dat de lift volledig elektrisch moet zijn of mag er ook gebruik worden gemaakt van een elektrisch gestuurde pneumatische drukcilinder (of iets dergelijks)?
Auteur: Ruud
Laatst bijgewerkt:2013-09-30 13:38
Hoe maak ik een referentie naar een website of boek in een verslag of rapport?
Auteur: Harry van der Pol
Laatst bijgewerkt:2013-09-30 13:52
Wat is Robotica [IDP]?
Robotica is het interdisciplaire project van de NHL Stenden hogeschool.
Dit 2e jaars project speelt zich af in de 4e periode van de opleidingen Elektrotechniek, HBO-ICT, Werktuigbouwkunde.
De opdrachtgever is het robotica team.
Meer informatie: https://blackboard.nhlstenden.com/
Auteur: Hendrik
Laatst bijgewerkt:2019-04-10 09:23
Software Pakketten » 20 SIM
Geen verbinding met het TS7300 bordje. Wat is er mis?
Mocht het toch niet werken; De volgende mogelijke oorzaken zijn tot nu toe gevonden:
1) Zit de SD card waar het OS op staat er wel goed in? Als de SD card er niet goed in zit, zullen de lampjes bij de ethernet connector met een regelmaat van enkele seconden aan en uit gaan.
Auteur: Harry
Laatst bijgewerkt:2011-12-05 09:30
Hoe kopieer ik een deel van een schema als een plaatje naar bijvoorbeeld Word?
- Selecteer dat deel van het schema dat je kopieren wil.
- Kies CTRL+C
- Ga naar Word en doe daar CTRL+V.
- Doe dit bij voorkeur in een drawing canvas.
Dan heb je meer opties om de ruimte rondom het figuur aan te passen.
Voor het aanmaken van een canvas kies in Word "Insert" -> "Shapes" -> "New Drawing Canvas"
Auteur: Harry van der Pol
Laatst bijgewerkt:2012-06-11 14:07
Bode plot maken, range aanpassen en uitlezen van waardes
Stap1)
Sleep model "linear system" uit de bibliotheek "signal,Blockdiagram" in het werkblad
Stap2)
Dubbelklik en verander de eigenschappen van het systeem naar wens.
Stap3)
Klik op het knopje Bode
Stap4)
Rechtermuis klik in het Bode Plot window stelt je instaat om de eigenschappen zoals de frequentierange aan te passen. Klik daarna nogmaals op het "Bode" knopje uit stap3 om de plot voor de nieuwe range opnieuw te laten tekenen.
Stap5)
Uitlezen waarden kan bijvoorbeeld met Rechtermuis toets en aanvinken van Numerical. In het onstane window kun je een horizontale scrollbar bewegen om de waardes op verschillende plekken in de plot uit te lezen.
Auteur: Harry van der Pol
Laatst bijgewerkt:2012-11-12 15:55
Software Pakketten » ActiveBoard (Inspire)
Hoe verander ik de "Page Transition Effects"
ActiveBoard: Page Transition Effects

Wordt niet gesaved in de flipchart.
Is in te stellen bij:
File, Settings, Flipchart, Page Turn effects
Auteur: Harry van der Pol
Laatst bijgewerkt:2011-11-24 16:11
Hoe neem ik een stukje screenshot over in mijn flipchart?
Ga naar desktop tools. Shortcut F6
Je krijgt nu een rondje te zien.
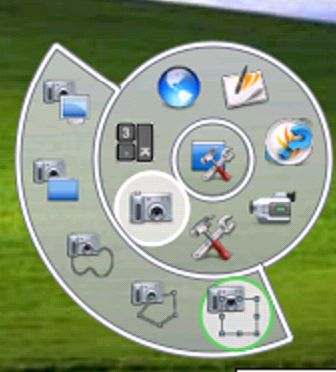
Selecteer hierin de camera en vervolgens 1 van de camera opties: (rectangle, free form of gehele scherm bijvoorbeeld)
Geef nu het deel van het scherm aan dat je zou willen kopieren.
Kies de bestemming in ActiveInpire.
Ga weer terug naar je flipchart door niet de camera te selecteren maar de flipchart. Ergens iets rechts van bovenin.
Auteur: Harry van der Pol
Laatst bijgewerkt:2012-01-12 17:16
Vragen beheer voor ActiveBoard Expression Stemkastjes
Gebruik short-curt CTRL-SHIFT-Q
Auteur: Harry van der Pol
Laatst bijgewerkt:2012-01-13 11:26
Actie toevoegen aan een item
Selecteer een item, bijvoorbeeld tekst of een plaatje.
Press shortcut F10
Kies bijbehorend actie. Bijvoorveeld via een weblink een Youtube filmpje starten
Auteur: Harry van der Pol
Laatst bijgewerkt:2012-01-13 11:28
Pen aanpassen voor gebruik met ProWise schermen
Als je merkt dat de pen van ActiveBoard of ActiveInspire bij een ProWise scherm niet werkt en alleen maar selecteert en dus niet schrijft bekijk dan het filmpje om de instellingen aan te passen.
NB: DOE DIT ALLEEN IN ACTIVEINSPIRE IN EEN KLASLOKAAL
Als je dit zou doen in ActiveInspire op je NHL Laptop dan heb je kans dat je ActiveBoard profielen in de war raken
Auteur: Harry van der Pol
Laatst bijgewerkt:2015-11-23 11:55
Software Pakketten » BlackBoard
Wij kunnen geen bestanden uploaden op onze groepspagina op blackboard.We krijgen een foutmelding dat de beschikbare schijfruimte overschreden is.
Dit probleem is bekend en als het is onderhand opgelost voor IDP, de oplossing voor P4P komt eraan (nog even geduld).
Het bleek een instellingsprobleem te zijn aan de beheerderkant van blackboard.
Onderhand zou het file oploaden ook voor P4P weer moeten werken.
Auteur: Hendrik
Laatst bijgewerkt:2013-09-30 13:39
Een strategie voor een nieuw cursusjaar
Strategie nieuwe cursusjaar BlackBoard

- Download de cijferinformatie in Excel formaat en bewaar hem op mijn schijf in het bijbehorende cursusjaar
- gebruik de oude cursus opnieuw.
- Verwijder alle studenten die al WEL hebben voldaan aan alle eisen.

Met deze strategie zou het ook mogelijk moeten zijn om MAPLE TA links in je BB course in stand te houden. (Maple TA verreist blijkbaar dat de naam van de cursus niet mag veranderen anders is de link zoek)
Auteur: Harry van der Pol
Laatst bijgewerkt:2013-09-30 13:36
Alleen downloaden van files van assignments die nog beoordeling behoeven.
Blackboard: Only donwload files that need grading.
Zie filmpje
Auteur: Harry van der Pol
Laatst bijgewerkt:2014-02-10 13:06
Hoe krijg ik een email als er een assignment is ingeleverd op BB?
Voor aanzetten van notificatie via email zie filmpje
Auteur: Harry van der Pol
Laatst bijgewerkt:2014-07-07 11:29
Hoe maak ik een inleveropdracht gekoppeld aan het gradecenter?
Zie filmpje
Auteur: Harry van der Pol
Laatst bijgewerkt:2015-11-17 18:02
Wrong group added to assignment by mistake. What can I do?
BlackBoard: Wrong group added to assignment by mistake
Suppose you have a group assignment. Maybe already for years and you want to add the groups for this year to the assignment. BUT, instead of adding the project groups you added the group containing the whole class! This will ensure that if one student uploads an assignment, and you grade it, all students will have this grade!
This is not want you want, so how to solve it.
It is not possible to remove a group from an assignment, and certainly not if one student of that group has already uploaded an assignment. SO WHAT TO DO?
Situation 1
You notice your mistake before any student has uploaded an assignment and you did not use the erroneously added groupname may times in "adaptive release of content" or in "smart views" in the grade center. Then you can do this:
Step 1:
First make you assignment unavailable so no student can upload something for this assignment.
Step 2:
Create a new group for every group that you added to the assignment in error, move all the members to the new group, delete the old group, and rename it again. So for example, if one of the groups would have had the name “Class2016” do the following:
Go to Groups, add a new group with the same name and add for example “_tmp” to the end of the group name. For example, creat the group “Class2016_tmp”
Move all the members from “Class2016” to “Class2016_tmp”
Delete the group “Class2016”
Check if your new group “Class2016_tmp” is not coupled to your assignment.
It probably isn’t. SO now rename “Class2016_tmp” back to “Class2016”
Step 3:
Make your assignment available again for students to upload their work.
Step 4:
The group that you added in error may also have been used in “Smart Views” of the grade centre or in “adaptive release” of content. You will have to add the group again as you deleted it before.
Situation 2
If you notice your mistake and one or more students have already uploaded an assignment and you have many students in your course you probably better solve it like this:
Step 1:
First make your assignment unavailable so no student can upload something for this assignment anymore.
Step 2:
Create a new assignment just like the one you made an error with. Couple the right groups.
This is probably the easiest and quickest solution. But it has the draw back that students will now see two items in their grade book. (My Grades). And one of them will always be ungraded. Depending on whether they are “older” students of students from the course of the current year. And of course as a teacher you have now two columns in your grade book for the same grading item.
Maybe it is good to know that the text used at “description” in a grade centre column is also viewable by students in their MyGrades overview. You might use this like “This grading item is only valid for students taking this course in 2016 or before.”
Auteur: Harry van der Pol
Laatst bijgewerkt:2018-02-13 12:31
Software Pakketten » Educator
Vinden van een vak voor bewerking
Educator:

Vinden van een vak voor bewerking van de inhoud.
a) Zoek de code op door te zoeken in de catalogus. Gebruik * als wildcard anders vind je je onderwijseenheid niet
b) ga naar catlogus invoer en tik in het zoekwindow in: %code  Bv %DRGT4 voor digitale regeltechniek 4
Auteur: Harry van der Pol
Laatst bijgewerkt:2011-11-24 16:23
Software Pakketten » Excel
Hoe kan ik een macro in Excel "digitally signen"
Een macro in Excel digitally signen

Ga in Excel naar het VBA project (ALT-F11)
Tools,  Digital Signature

Voor meer info:
http://office.microsoft.com/en-us/excel-help/digitally-sign-a-macro-project-HA001231781.aspx

Evt wel eerst een certificaat aanmaken met selfcert.exe
Te vinden in:
Start Menu\Programs\Microsoft Office\Microsoft Office Tools
Auteur: Harry van der Pol
Laatst bijgewerkt:2011-11-24 16:13
WORD2010: Hoe voeg ik een deel van een Excel file toe aan een WORD document?
How to link to or embed an object from an Excel file in WORD
- Open both the Word document and the Excel worksheet that contain the data that you want to create a linked object or embedded object from.
- Switch to Excel, and then select the entire worksheet, a range of cells, or the chart that you want.
- Press CTRL+C.
- Switch to the Word document, and then click where you want the information to appear.
- On the Home tab, in the Clipboard group, click the arrow under Paste, and then click Paste Special.
- In the As list, select Microsoft Office Excel object.
- Click Paste to insert an embedded object, or click Paste link to insert a link to the object.
Auteur: Harry van der Pol
Laatst bijgewerkt:2016-12-01 16:56
How can I change the AutoRepublish settings of an Excel file?
AutoRepublish is used to save a copy of a part of the Excel file to a webpage everytime you save the file.
What if you want to change the settings?
(Excel 2010)
1) Select "Save As Single File Web Page"
2) Click the button 'Publish'
3) Choose "Previously Published Items" (Use the selectbox left of the button "Choose")
4) It seems you have to click 'Publish' everytime you make a change to make it last. So if you have several areas you want to publish you will have to click a lot.
NB:
If you open a file with AutoRepublish setings in Microsoft Excel for MAC and ignore the warning your autorepublish settings will be lost.
Auteur: Harry van der Pol
Laatst bijgewerkt:2017-06-13 16:47
Software Pakketten » Maple TA
How can I add a comment line in Maple TA?
Sometimes it is handy to put comments in the algortihm section to explain and later remember how the algorithm works. You can enter comments by starting a line with a ':' and ending it with a ';' like:
:# You can enter comments by starting with a colon ':' and ending the line with a semicolon ;
I usually add a '#' directly after the ':' to make it more visible. It is not necessary.
NB: Apparently using a single quote ' within your comment line, like using the word don't in your commentline can cause malfunction. Better write
":# do not #;
in stead of
":# don't #;
Auteur: Harrie
Laatst bijgewerkt:2016-12-02 11:06
Where can I find a good equationeditor to generate MathML of LaTex code?
This one could be interesting:
http://visualmatheditor.equatheque.net/VisualMathEditor.html
It is a nice editor which also shows you how the formula looks like that you are editting.
With menu "View, MathML translation" you get the MathML code
Auteur: Harry van der Pol
Laatst bijgewerkt:2016-02-22 17:15
How can I view all classes in a Maple TA server?
1) Click on the logo Maple TA
2) "Class Manager", "Class Search"
3) Click on "Tree View" on th e left.
Auteur: Harry van der Pol
Laatst bijgewerkt:2016-03-10 13:46
Hoe kan ik vragen importeren?
Importeren van een vragenbank en/of modules kan op twee manieren:
1) Voor manifest.xml files opgenomen in een <name>.zip file:
- Ga naar de class waar je wilt importeren.
- Klik op "Questions" rechts op de derde regel -> Question Repository
- Klik op "Course Modules" (linker kolom een beetje boven),
- Klik op "Import", selecteer de .zip file en vervolgens GOED lezen !
2) Voor .qu files van Question Banks:
- Ga naar de class waar je wilt importeren.
- Klik op "Questions" rechts op de derde regel -> Question Repository
- Klik op "Import Question Bank". Hiermee kun je alleen .qu files importeren
Auteur: Harry van der Pol
Laatst bijgewerkt:2017-05-23 11:09
Wat is de invloed van een single quote ' in een commentaar regel?
Blijkbaar werkt onderstaande commentaarregel niet:
:# eventueel kan daaraan don't care worden toegevoegd. #;
Als je de single quote weghaalt wel. Schrijf bijvoorbeeld do not in plaats van don't
Auteur: Harrie Rouwhorst
Laatst bijgewerkt:2016-12-02 11:03
Software Pakketten » Matlab / Simulink
Handy Commands for Matlab
Matlab & Simulink
Some handy commands:
 - clc     : clear command window
 - ver     : To see which versions and toolboxes are installed.
 - zpk     : zeros, poles and gain zpk(sys)
 - tfdata  : to extract numerator and denumerator from an equation
             tfdata(Sys,'v')  alternatief Sys.num{1,1}
 - minreal : to reduce an equation where possible
 - c2d     : convert from s-domain (continous) to z-domain (discrete)
Auteur: Harry van der Pol
Laatst bijgewerkt:2014-02-18 21:12
Hoe vereenvoudig ik een vergelijking door polen en nulpunten tegen elkaar weg te strepen?
De functie:
zpk(overdracht)
factoriseert je overdracht in teller en noemer en laat zo de polen en de nulpunten zien. Zie je dan termen in de teller die je ook in de noemer ziet, dan kun je de functie:
minreal(overdracht)
gebruiken.
Auteur: Harry van der Pol
Laatst bijgewerkt:2011-12-13 14:54
Starting a Simulink job from a Matlab Script
Suppose you have a model in Simulink. And suppose that parameters of this model are calculated in a Matlab script.
In that case it could be handy that if you run the script in Matlab it also executes the simulink model and gives you the results. (instead of running the matlab script, switching to Simulink, start a simulation there and then clicking and autoscaling the plotwindow from Simulink).
I have got some options.
Option1
Suppose the simulink model is saved under the name BlueBox_ClosedLoop.mdl
%% Start and simulate simulink model (StructureWithTime)
Model = 'BlueBox_ClosedLoop';
load_system(Model)
% Copy current settings associated with model
Cs = getActiveConfigSet(Model);
Model_cs = Cs.copy;
% and adapt them
set_param(Model_cs,'AbsTol','1e-5',...
         'SaveState','on',...
         'SaveOutput','on',...
         'SaveFormat', 'StructureWithTime');
% Run simulation
SimOut = sim(Model, Model_cs);
% Extract and plot data
SimOutScopeData = SimOut.get('ScopeData')
figure(1);
plot(SimOutScopeData.time,SimOutScopeData.signals.values);
title(sprintf('Simulink Output for %s \n',SimOutScopeData.blockName));
grid on;
Option 2
Replace the lines below "% Extract and plot data" with the following:
% Create a run in the Simulation Data Inspector
runID = Simulink.sdi.createRun('My Run','base',{'SimOut'});
% See the results in Simulation Data Inspector
Simulink.sdi.view;
Option 3
Below a function you could call like
simulink_run('Model Name')
to create a figure for each scope in your Simiulink model. Save this m_script somewhere in your Matlab Path
%void SimulinkRun(string Model)
function simulink_run(Model)
%%  Start and simulate simulink model (make a figure for each scope)
%
load_system(Model);

% Copy current settings associated with model
Cs = getActiveConfigSet(Model);
Model_cs = Cs.copy;
% and adapt them
set_param(Model_cs,'AbsTol','1e-5',...
         'SaveOutput','on',...
         'SaveFormat', 'StructureWithTime');

% Find all scope blocks in the model
ModelScopes = find_system(Model,'LookUnderMasks','on','IncludeCommented','on',...
'AllBlocks','on','BlockType','Scope','DefaultConfigurationName',...
'Simulink.scopes.TimeScopeBlockCfg')
% Set all Scope parameters
% Note use {} instead of () to access cell arrays
for i=1:length(ModelScopes)
    ScopeConfig = get_param(ModelScopes{i},'ScopeConfiguration');
    ScopeConfig.DataLogging=true;
    ScopeConfig.DataLoggingVariableName=['ScopeData' num2str(i)];
    ScopeConfig.DataLoggingSaveFormat='StructureWithTime';
end

% Run simulation
SimOut = sim(Model, Model_cs);

% Extract and plot data
for i=1:length(ModelScopes)
    SimOutScopeData = SimOut.get(['ScopeData' num2str(i)])
    figure(i);
    plot(SimOutScopeData.time,SimOutScopeData.signals.values);
    title(sprintf('Simulink Output for %s',SimOutScopeData.blockName), ...
        'interpreter', 'none');
    grid on;
end
end % Function
Before Matlab 2016 the function simplot was still supported and then it was implemented as follows.
Suppose the simulink model is saved under the name Pr_E4_Deadbeat.mdl
%% Start and simulate simulink model
% Open simulink model
Pr_E4_Deadbeat;
% command gcs refers to the current system model
% command gcb refers to the current block model
set_param(gcs, 'SaveOutput', 'on');
set_param(gcs, 'SaveFormat', 'StructureWithTime');
%Met 'Scope' de naam van de simulink scope die je wilt zien
set_param([gcs '/Scope'], 'SaveToWorkspace', 'on');
set_param([gcs '/Scope'], 'SaveName', 'ScopeData');
sim(gcs);
simplot(ScopeData);
The 2 lines after opening the model instruct the simulink simulation to enable saving of the simulationresult to the workspace of Matlab. 'sim(gcs) 'starts the simulation and the next line plots the result. ScopeData is the default name that simulink uses in a plotwindow.
Auteur: Harry van der Pol
Laatst bijgewerkt:2017-07-03 17:33
Simulations with a different value of a variable
You could ofcourse adapt the value of an variable, save the m-script and then run it again. That will overwrite your simulationplot with a new result.
There is another way to simulate for various values of an variable. See movie (approx 30 seconds).
Main idea is: Right click on the value of your variable and select "Increment Value and Run section". It requires that the whole simulation you want to do is within an section. (Sections or cells can be created with %% Name section)
Auteur: Harry van der Pol
Laatst bijgewerkt:2017-11-21 09:31
How can I make the output graph of Simulink smoother?
You can change the default settings of the simulator.
Within Simulink go to menu:
Simulation => Model Configuration Parameters
It can take a while before the window appears.
You now have two options.
Option 1
Select "Solver" category on the left and then under "Additional options" change "Max step size" .
Default it is on "auto". Change it to a timestep which is low enough to show the smoothness you need.
Option 2
Select "Data Import/Export" category on the left and then under "Additional parameters" change "Output Options" to "Refine Output" and the "Refine Factor" from 1 to for example 4. It defines the extra points to calculate.
The benefit of this solution is that it works independent of the dynamics of the various models and does not create many unnecessary simulation points for a relative slow model as when you would use the max step size option.
NB: Using Refine Output has no influence on the smoothness of the curve you will see in the Simulation Data Inspector. It has influence on the smoothness of the data exported to the Workspace and the Scopes in the Simulink model
Auteur: Harry van der Pol
Laatst bijgewerkt:2017-11-21 15:42
Get or set parameters of objects
There are various ways to read/write or get/set the values of parameters of objects.
Option1 for objects within Simulink for example
Suppose a simulink model is saved under the name BlueBox_ClosedLoop.slx
% To find the parameters of the block 'PID Controller' in this Simulink model
get_param('BlueBox_ClosedLoop/PID Controller','DialogParameters')

% To get the current value of the parameter called 'P'
get_param('BlueBox_ClosedLoop/PID Controller','P')

% To set the value of an parameter use
set_param('BlueBox_ClosedLoop/PID Controller','P',num2str(Kp))
% NB: you have to use strings in this case to pass a numerical value
Option 2 for variables in the Matlab workspace
Suppose you have an variable called Proces denoting a transfer function of the type 1x1 tf
% To find the parameters of the transferfunction called Proces
get(Proces)

% To get the current value of the parameter called 'IOdelay'
get(Proces,'IODelay')             % or use the command: Proces.IODelay

% To get the coefficients of the Numerator you have to change something, because
get(Proces,'Numerator')           % or use the command: Proces.Numerator
% will give you a result looking something like:  ans = [1x4 double]
% to access the actual coefficients do:
Proces.Numerator{1}
% In general use the construct: <Object>.<parameter>{<element number>}

% Set values for parameters goes like this
set (Proces,'IODelay',1)          % or use the command: Proces.IODelay=1
% NB: Here numbers are used and not strings to transfer the values for numbers
Auteur: Harry van der Pol
Laatst bijgewerkt:2017-11-21 10:28
Formatting your m-script for publishing your code
%% Formatting for publishing your code
%
% Below some examples to write your code in such a way that enables easy
% publication to HTML or PDF
%
% "%% " at the start of a lin indicates a new "cell" or paragraph.
% Try the menu command "Publish, Publish" once to see the result.
%
% Use %<newline> and then two spaces after the % sign for preformatted text like
%
%  Preformatted Text1
% Preformatted Text2
%
% Use %<newline> and then three spaces after the % sign to show Matlab code like
%
%   for x = 1:10
%       disp(x)
%   end
%
% This example allows you to include equations with the aid of LaTex code:
% $$\overline A + \overline B=\overline {A \cdot B}$
%
% Use |text| to display text in a monospaced font. Handy to display
% computercode for example: |Longitude   = "4.890934";|
More info:
https://nl.mathworks.com/help/matlab/matlab_prog/marking-up-matlab-comments-for-publishing.html
Auteur: Harry van der Pol
Laatst bijgewerkt:2017-11-21 11:51
How can I dock a figure in a m-script?
Add the set command below to your figure declaration to get it into Docked mode.
h=figure(1); set(h,'WindowStyle','docked')
Auteur: Harry van der Pol
Laatst bijgewerkt:2017-12-01 12:06
How can I calculate the phase margin and/or the gain margin in a Matlab m-script?
% Phase and gain margin can be read from the bode plot.
%
%% For demonstration purpose we first define an arbitrary open loop proces
s=tf('s');
Hopen=2/((s+1)*(s+2)*(s+3));
% create a figure handle that is not likely to be used already
% and plot the bode diagram
figure(100);
bode(Hopen);
grid on;
%
%%  Compute the margins with the margin function as follows:
[Gm,Pm,Wgm,Wpm] = margin(Hopen);
% display the results
disp(['Gain margin is : ', num2str(Gm), ' at ', num2str(Wgm), ' rad/s']);
disp(['Phase margin is : ', num2str(Pm), ' degrees at ', num2str(Wpm), ' rad/s']);
Auteur: Harry van der Pol
Laatst bijgewerkt:2018-03-05 16:56
Software Pakketten » Outlook
How to add an Macro to the toolbar in Outlook?
Adding a macro toolbar in Outlook:

Make sure that your toolbar is visible:
View, Toolbars and select your toolbar

Then:
Tools, Customize
Select Tab: Commands
Select Categorie: "Macros"
Click "Rearrange Commands"
Select option Toolbar
and select via dropdown list the appropiate toolbar

Click Add
Auteur: Harry van der Pol
Laatst bijgewerkt:2011-11-24 16:09
Add comments to HTML or RTF email in Outlook 2007.
Add comments to HTML or RTF email in Outlook 2007.

The comments feature in Outlook basically works the same as it does in Word. When you add a comment, Outlook highlights the selected text, includes a balloon with your comment, along with your initial.

To add comments to a message:

Open the appropriate message.
Click Other Actions and click Edit Message.
Select the word or phrase to which you want to add a comment.
Press Ctrl+Alt+M and type in your comment.
Repeat step 4 to include additional comments.
When you reply to the message, after inserting your comments, they will be included in the message.
Auteur: Harry van der Pol
Laatst bijgewerkt:2011-11-24 16:16
Instellen opzoek volgorde e-mail adressen
Instellen opzoek volgorde e-mail adressen:
Tools, Adress Book, Tools, Options ...
Auteur: Harry van der Pol
Laatst bijgewerkt:2011-11-24 16:37
Hoe een ontvangen email te bewerken in outlook 2010
- Bewerk bij de opties het lint en/of werkbalk snelle toegang
- Kies uit 'alle opdrachten' bericht bewerken en voeg deze toe
Gebruik de nieuwe knop om een geopende email te bewerken
Auteur: Hendrik
Laatst bijgewerkt:2016-03-22 11:29
Software Pakketten » Powerpoint
Dual screen gebruik bij Powerpoint
Dual screen bij Powerpoint:
"Slide show, Set Up Show"

Klik  aan bij Mulitple Monitors waar je de presentatie wilt zien.
Je kunt ook gebruik maken van "Show Presenter View"

je kunt ook helemaal onderin opgeven naar welke resolutie tijdelijk geswitched moet worden voor presentaties.
Bijvoorbeeld: je standaard 2e monitor heeft een resolutie van 1200x1024 maar de meeste beamers ondersteunen maar 1024x768.
Auteur: Harry van der Pol
Laatst bijgewerkt:2011-11-24 16:31
Kan ik de grootte van mijn Word of Powerpoint bestand verkleinen?
Ja, waarschijnlijk wel. Zie filmpje.
Auteur: Harry van der Pol
Laatst bijgewerkt:2016-02-11 13:30
Software Pakketten » PSI
PSI van Blockdiagram naar Textmodel
PSI van Block naar Text:
Selecteer window met blokken. Kies Show, Compiled Diagram et voila
Auteur: Harry van der Pol
Laatst bijgewerkt:2011-11-24 16:32
Hoe maak ik een referentie naar een website of boek in een verslag of rapport?
Auteur: Harry van der Pol
Laatst bijgewerkt:2013-09-30 13:52
Mag er ook een hovercraft gebouwd worden?
Auteur: Ruud
Laatst bijgewerkt:2013-02-15 14:30
In het wedstrijd document staat over 7. Het ravijn het volgende: "Deze elektrisch aangedreven inrichting". Houdt dit in dat de lift volledig elektrisch moet zijn of mag er ook gebruik worden gemaakt van een elektrisch gestuurde pneumatische drukcilinder (of iets dergelijks)?
Auteur: Ruud
Laatst bijgewerkt:2013-02-15 14:30
Bij hindernis 3 wordt gesproken over een plank, deze zal 10 cm onder water steken. Wat is de lengte van de plank?
Auteur: Ruud
Laatst bijgewerkt:2013-02-15 14:30
Mag technisch lego gebruikt worden?
Auteur: Hendrik
Laatst bijgewerkt:2014-09-11 08:58
Moet er gebruik gemaakt worden van de Lego wielen?
Auteur: wieltje
Laatst bijgewerkt:2014-09-11 14:48
Hoeveel spanning en stroom leveren de zonnepaneeltjes binnen. (type Conrad 9 Volt 100 mA code=191334)
Auteur: Jelle Huitema
Laatst bijgewerkt:2014-09-16 13:48
Hoe maak ik een referentie naar een website of boek in een verslag of rapport?
Auteur: Harry van der Pol
Laatst bijgewerkt:2013-09-30 13:52
Waar moet het reflectieverslag worden ingeleverd?
Het reflectieverslag kun je inleveren op blackboard.
Kijk in het coursemenu naar 'reflectieverslag inleveren', op de bijbehorende pagina is te zien wat de bedoeling is.
Vergeet niet de template te gebruiken.
--> link <--
Auteur: ...
Laatst bijgewerkt:2016-06-11 16:53
Software Pakketten » Visual Elite
Failure: can't link design containing optimized units. Check your environment settings
Deze foutmelding krijg je wanneer je niet opgestart hebt met visual elite 'interpreted synopsys 93'.
Wanneer deze niet beschikbaar is, dan is waarschijnlijk bij de installatie een optie vergeten.
In dat geval is het nodig de installatie nogmaals te doorlopen.
Wanneer het eerder wel goed gewerkt heeft, gebruik dan de correcte opstartlink of ini-file.
Auteur: Hendrik
Laatst bijgewerkt:2016-09-14 18:56
Failure: "Failed to find library: …"
Mogelijke oorzaken en oplossingen:
- Het kan zijn dat de directory van de library niet bestaat. Maak die directory m.b.v. Visual Elite.
- Het kan zijn dat de library-directory wel bestaat, maar dat de libmap.see in die directory ontbreekt. Verwijder die directory en maak hem opnieuw m.b.v. Visual Elite.
- Het kan zijn dat je te weinig ruimte op je U-schijf hebt. Dan kan Visual Elite geen library-directory maken. Wis overbodige mappen en bestanden en probeer het opnieuw.
- Zorg ervoor dat je prullenbak leeg is.
Auteur: Harry van der Pol
Laatst bijgewerkt:2016-11-17 16:00
Failure: "Can’t …..optimized units"
Mogelijke oplossingen: (probeer eerst nummer 1, dan pas nummer 2 enz.)
- Alle onderdelen opnieuw compileren met compile (tree) interpreted.
- Visual Elite afsluiten en daarna opnieuw starten.
- Werkt dit niet, dan is het mogelijk dat je de verkeerde Visual Elite versie op je laptop hebt geïnstalleerd.
Doe de installatie nogmaals en zorg ervoor dat je de opties borland en visual c uit hebt staan en synopsis interpreted aan.
Auteur: Harry van der Pol
Laatst bijgewerkt:2016-11-17 16:07
Failure: "…….ieee.1164 must be recompiled"
Mogelijke oplossingen:
- Ga in de browser naar de Synopsis library en compileer alles wat nog niet gecompileerd lijkt met ‘compile interpreted’.
- Ga in de browser naar de IEEE library en compileer alles wat nog niet gecompileerd lijkt met ‘compile interpreted’.
- Compileer je eigen input opnieuw.
Auteur: Harry van der Pol
Laatst bijgewerkt:2016-11-17 16:16
Failure: "Std_logic not visible"
Mogelijke oplossing:
- Voeg het global package ieee toe.
- Kies ‘update component tree’ voor alle componenten.
- Compileer opnieuw.
Indien de laatste slag niet werkt: maak een nieuwe entity en architecture met dezelfde inhoud als de bestaande, en delete de oude entity en architecture.
Auteur: Harry van der Pol
Laatst bijgewerkt:2016-11-17 16:11
Failure: "…… OR protected"
Voeg via “load environment” de juiste ini-file toe.
Auteur: Harry van der Pol
Laatst bijgewerkt:2016-11-17 16:18
Weinig keuzemogelijkheden bij ‘default types’ en ‘global packages’.
Voeg via “load environment” de juiste ini-file toe.
Auteur: Harry van der Pol
Laatst bijgewerkt:2016-11-17 16:19
Failure: foutmeldingen na toevoegen of verwijderen van in- en uitgangen
Symptoom:
Na het toevoegen en/of verwijderen van in- en uitgangen en signalen in blokdiagrammen, krijg je steeds foutmeldingen waarin de benaming van het betreffende in- / uitgangen /signalen voorkomen.
Door de volgende handelingen is na te gaan waar een probleem zit:
- Selecteer met <rm> het blok.
- Kies ‘Attributes’>’Associate’>’Match by name’. Dan krijg je een overzicht van de koppelingen van tussen de ‘buiten- en de binnenkant’ van het blok. Wat er mis is, kun je dan verbeteren.
- Kies daarna “apply”.
- Krijg je daarna nog foutmeldingen bij het compileren, dan moet je na selectie van het blok met <rm> kiezen voor ‘Update Topdown’.
Auteur: Harry van der Pol
Laatst bijgewerkt:2016-11-17 16:46
Failure: "... ieee.STD_LOGIC_1164.all is newer"
1) Start Visual Elite opnieuw op en verzeker je ervan dat je VHDL 93 interpreted opstart.
2) Ga elke unit in je boom na en doe:
a) voeg een letter toe en haal die weer weg.
b) er is nu niets veranderd maar je kunt nu wel saven
c) compileer de unit opnieuw
Auteur: Harry van der Pol
Laatst bijgewerkt:2016-11-22 13:00
Hoe weet ik welke Architecture gebruikt wordt voor een Entity?
Gebruik de "Tools > Browser"
Die architecture beschrijving met een letter (D) er in is degene die gebruikt wordt in de simulatie als default architecture voor de entity.
De laatst gecompileerde architecture krijgt de letter (D) en wordt meegenomen in de simulatie.
Je kunt wisselen van architecture door een andere Architecture te compileren en vervolgens te kiezen voor "Simulate, Resimulate". Je hoeft dan niet opnieuw een Graphical Wave Analysis window te maken. Je kunt dan gebruik maken van de al bestaande.
Auteur: Harry van der Pol
Laatst bijgewerkt:2016-12-01 15:34
Failure: Bij Acquire krijg ik geen signalen.
Acquire selecteert de signalen uit het laatst geselecteerde window voordat je op Acquire klikt.
Auteur: Harry van der Pol
Laatst bijgewerkt:2016-12-01 17:03
Failure: "A parameter/port ... of mode ... can not be read in ..."
Er is een conflict tussen input en output.
De naam van een in- of uitgangsconnector mag niet gelijk zijn aan een signaalnaam die in het schema verbonden is met resp. een out- of input.
Als je de naam van de connector niet wilt veranderen volg je deze stappen:
- Geef de signaaldraad aan de connector een andere naam. De connector wijzigt nu automatisch mee.
- Selecteer nu alleen de connector en wijzig deze naam terug in de oorspronkelijke naam.
NB: De foutmelding kan ipv het woord 'read' ook het woord 'write' bevatten
Auteur: Harry van der Pol
Laatst bijgewerkt:2016-12-06 17:32
Waarom krijg ik bij "Acquire Signals" in het Graphical Wave Window geen signalen te zien?
Als je op "Acquire Signals" in het Graphical Wave Window klikt krijg je die signalen te zien die beschikbaar waren in het (Entity of Block Diagram) window dat actief was direct voor je het Graphical Wave Window activeerd/selecteerd.
Auteur: Harry van der Pol
Laatst bijgewerkt:2016-12-15 13:11
Google » Google Sheets
How can I make a link that downloads a Google Sheet in Excel format?
If you want to create a link which enables you to download a Google Sheet as an Excel file you have at least two options. The options below are valid for a sheet within the nhl.nl domain. In order for this to work you have to publish your Google Sheet first using "File, Publish to the Web" within your Google Sheet in a browser. You can decide which parts you want to publish.
1) Option 1
https://docs.google.com/a/nhl.nl/spreadsheet/pub?key=0BtnMxE5EWx8vdENtUjJZZkMxYzZUZ1dSMk5kSG9ZNkE&single=true&gid=0&output=xls
2) Option 2 does the same:
https://docs.google.com/spreadsheets/d/0BtnMxE5EWx8vdENtUjJZZkMxYzZUZ1dSMk5kSG9ZNkE/pub?pref=2&single=true&gid=0&output=xls
The key 'gid' stands for an identifier selecting a certain sheet/tab within your Google Sheet. You can find this number in the address bar of your browser when the tab/sheet is selected. In the options above the used key is a random one
Auteur: Harry van der Pol
Laatst bijgewerkt:2016-02-16 11:52
How can I make a link that opens a certain sheet or tab within a Google Sheet?
Use the 'gid' key in the link.
For example:
https://docs.google.com/spreadsheets/d/12E54t8oj9K9MDNILOXTwo5CkQiOlaozFP43lCObgB8k/edit?pref=2&pli=1#gid=1526123940
The used key is a random one used for an example. This is also true for the 'gid' key.
You can find the 'gid' number in the addressbar of your browser when the sheet you want to link to is selected. Use gid=0 for the first sheet within the Google Sheet
Auteur: Harry van der Pol
Laatst bijgewerkt:2016-02-16 11:57
How to make a different view of rough data from for example a Google Form responses sheet?
Use a combination of the function IMPORTRANGE which output is the input for the QUERY function. Because of this combination you will have to use 'Col1' to indentify the first Coloumn instead of using letters like in Excel.
Also a special construct is used to refer to data within the sheet to base the selection on. In field $C$5 there might be a selection box to select certain values to base the query on.
=QUERY(IMPORTRANGE($B$3; "Form Responses!B1:M100"); "Select Col1, Col5, Col9 where Col9 contains '"&$C$5&"' order by Col1";0)In field $B$3 the (long)key of the sheet you want to retrieve the data from is stored. In field $C$5 some text is stored which you can used to select the datarows you want to show.
Another example in which two other functions are used: determining the average value and replacing the label text with values from the current sheet:
=QUERY(IMPORTRANGE($G$2;"Form Responses!D1:AD100");"select Col1, avg(Col15), avg(Col19), avg(Col20), avg(Col21) where Col1<>'' group by Col1 label avg(Col15) '"&$B$7&"', avg(Col19) '"&$C$7&"' , avg(Col20) '"&$D$7&"', avg(Col21) '"&$E$7&"'";1)
And an example with more than one selection clause:
=QUERY(IMPORTRANGE($B$3; "Form Responses!B1:M100");"Select Col1, Col5, Col6, Col7, Col8, Col9, Col10, Col11, Col2, Col3, Col4 where Col1<>'' and Col12 = 'Ja' and Col6 contains '"&$C$4&"' and Col7 contains '"&$D$4&"'";1)
Auteur: Harry van der Pol
Laatst bijgewerkt:2016-02-16 12:21
Google » Google Drive
How do I create a link to a html file on the Google Drive?
Step 1:
Make the document or folder it is in Public.
Select, Share, Advanced, Change, "On - Public on Web"
Step 2:
find the document ID. The long key from its URL. For example: https://drive.google.com/file/d/0B9nMxE5EWx8vMXQzb2hpNE5ZcWc/view?usp=sharing
Step 3:
The link to the html file is now:
https://googledrive.com/host/ID
In our case
https://googledrive.com/host/0B9nMxE5EWx8vMXQzb2hpNE5ZcWc
NB: Google will cease this service after august 2016
Auteur: Harry van der Pol
Laatst bijgewerkt:2016-02-16 17:28
Software Pakketten » Windows
Display settings aanroepen in een batchfile
Display settings aanpassen:
control desk.cpl,@1,3
Auteur: Harry van der Pol
Laatst bijgewerkt:2011-11-24 16:19
Short Cut voor rechtermuis klik
Short Cut voor rechtermuis klik:

De applicatie toets (links van de meest rechtse CTRL toets).

Bv: Een druk op de app toets opent hetzelfde menu als een rechtermuisklik in Excel.
app+'k' is dan een shortcut voor "Pick from list"
Auteur: Harry van der Pol
Laatst bijgewerkt:2011-11-24 16:28
OCR naar Word
OCR:
Scan een document in TIFF formaat. Gebruik de hoogste resolutie (300 dpi).

Open dit TIFF document in:
C:\Documents and Settings\All Users\Start Menu\Programs\Microsoft Office\Microsoft Office Tools\
Kies
Microsoft Office Document Imaging

Kies 'Tools, Recognize Text'
en dan
'Tools, Send Text To Word"
Auteur: Harry van der Pol
Laatst bijgewerkt:2011-11-24 16:29
Een onzichtbaar window verschuiven
Er staat iets op je tweede scherm alleen is dat niet aangesloten? En dat wil je weer zichtbaar hebben?

Ga naar de taskbar. Rechtermuisklik. Kies Move. Gebruik de (linker) pijltjestoets om het op je scherm te krijgen
Auteur: Harry van der Pol
Laatst bijgewerkt:2011-11-24 16:30
Command window onder een andere user naam
Command window onder een andere user naam:

runas /USER:LAN\blomadm cmd.exe
Auteur: Harry van der Pol
Laatst bijgewerkt:2011-11-24 16:35
Mijn draadloze WIFI verbinding werkt niet. Wat nu?
De volgende oplossingen hebben tot nu toe geholpen. Probeer er eens 1.
1) Disable en enable daarna de WIFI connection (Windows XP)
a) Ga naar je "network connections".
(Rechtermuis klik op draadloos icoontje in systray rechtsonderin scherm)
b) Rechtermuis klik op "Wireless Network Connection"
c) Selecteer "Disable"
d) Idem en nu selecteer "Enable"

Auteur: Harry van der Pol
Laatst bijgewerkt:2011-12-15 09:18
Wat doet igfxtray.exe? Of hoe kom ik bij de grafische settings van een intel videocard?
igfxtray.exe is een programma van Intel om de videosettings van zijn kaarten te wijzigen. Als je niet genoeg hebt aan de standaard instel mogelijkheden van Windows, start dan dit programma. c:\windows\system32\igfxtray.exe.
Na het starten vind je een icon in de tray rechtsonderin waarmee je de beeldscherminstellingen eenvoudig kunt veranderen.
In dezelfde range valt ook het programma: c:\windows\system32\hkcmd.exe
Dit programma moet je draaien om de Hotkeys zoals ingesteld met igfxtray.exe daadwerkelijk actief te maken.
Dit zijn hotkeys waarmee je bijvoorbeeld je scherm 90 graden kunt roteren.
Auteur: Harry van der Pol
Laatst bijgewerkt:2012-04-27 10:03
Hoe log ik automatisch in op een telefoon met een open laptop?
INloggen op telefoon met mac adres:
Opbouw url: http://cucm01.nhl.nl:80/emapp/EMAppServlet?device=SEP&userid=&seq=
MacAdress is aan de onderkant in het midden afleesbaar
==================================
with tool wget
Optie -q staat voor quiet
Inloggen:
wget -q "http://cucm01.nhl.nl:80/emapp/EMAppServlet?device=SEP0019e78ee892&userid=polh1&seq=passcode"
Uitloggen:
wget -q "http://cucm01.nhl.nl:80/emapp/EMAppServlet?device=SEP0019e78ee892&doLogout=true"
==================================
(under construction)
with telnet
telnet o cucm01.nhl.nl:80 sen
==================================
(under construction)
With netcat (source http://www.computerhope.com/forum/index.php?topic=41882.0)
echo "GET / HTTP/1.0
" | nc cucm01.nhl.nl 80
Auteur: Harry van der Pol
Laatst bijgewerkt:2012-06-06 12:47
Unassociate a filetype onder Windows XP
1. Open a command prompt with Administrator privileges by right clicking on the CMD icon and ‘Run as Administrator‘.
2. Type ‘assoc .extension= ’, so if you are trying to unassociate a file type with the extension .rcc, use ‘assoc .rcc= ’ etc…
Use the assoc command without arguments to see the list of all current file associations.
Bronnen: (Ook voor windows 7)
http://www.winhelponline.com/blog/unassociate-file-types-windows-7-vista/
http://www.raymond.cc/blog/how-unassociate-windows-vista-7-file-type/
Auteur: Harry van der Pol
Laatst bijgewerkt:2012-06-29 12:06
I can not delete a file or directory because access is denied.
Step 1) Go to the file / directory in a command window and use
cacls
to view the current access rights.
You can change the current
accessrights by using for example
cacls /C /G BUITLIN\Administrator:F
If you want to have an overview of
possible users go to the c:\ drive and
issue the command cacls there.
Step 2) Get the highest access rights
The local System account has higher
privileges than Administrator.
To start a command prompt under the
System account, issue the command
at (time) /interactive cmd.exe
Where (time) is the current time plus 1 minute.
Alternatively, download Sysinternals' PSTools and use
psexec -i -s cmd.exe
The elevated command prompt will
start in a different directory from usual,
which for me is C:\WINDOWS\system32>
Go to the file or directory you want to
delete and use:
rd
or
del
or if you don't want to delete the file
use calcs to change it access rights.
Auteur: Harry van der Pol
Laatst bijgewerkt:2012-10-04 12:55
Hoe voorkom ik de mededeling: "Kan de uitgever niet bevestigen. Weet u zeker dat u deze software wilt uitvoeren?"
>Weet u zeker dat u deze software wilt uitvoeren?
Om deze melding uit te schakelen geeft u de locatie van de server op aan Internet Explorer (IE) op uw werkstation.
Volg onderstaande instructies om de melding uit te schakelen.
1. Start Internet Explorer op
2. Klik op Extra
3. Klik op Internetopties
4. Klik op het tabblad Beveiliging
5. Klik op Lokaal Intranet
6. Klik op de knop Websites
7. Klik op de knop Geavanceerd
8. Voeg de server toe bij het veld “Deze website aan de zone toevoegen”
9. Wanneer het programma zich bevindt op Mijn_server in de map MIJNPROGRAMMA vult u in: \\Mijn_server\MIJNPROGRAMMA
10. Wilt u alle meldingen van alle programma’s op de server uitschakelen vult u in: \\Mijn_server
11. Klik op de knop Toevoegen (nadat u de regel heeft ingevuld)
12. Onder Websites ziet u nu staan: file://Mijn_server
13. Klik op Sluiten
Auteur: Harry van der Pol
Laatst bijgewerkt:2012-10-30 15:46
U: schijf vanaf laptop NHL
Auteur: Hendrik
Laatst bijgewerkt:2015-12-10 14:39
Scense: How to shut down Scense and compact the database to save space in your profile.
1) CTRL-ALT-SHIFT and click on logo on the right down side to log off from Scense and close the application
2) goto: C:\Users\\AppData\Roaming\Scense
3) Open ScenseELC.mdb
4) In Access, menu "Database Tools", "Compact and Repair"
Auteur: Harry van der Pol
Laatst bijgewerkt:2016-06-28 17:23
Software Pakketten » Word
Titel verschijnt niet bij printen (Office2010)
Bij een document wordt de tekst met paragraph tag "Titel" niet afgedrukt. Ook niet in PDF.
Oplossing:
Bewaar het document in Word2003 formaat en print dan af. (DoR)
Auteur: Harry van der Pol
Laatst bijgewerkt:2012-01-13 11:25
Cross reference zonder Label. Alleen een nummer. Bv: "zie figuren 1 t/m 3"
Just add \# 0 to the cross-reference field code.
From Source (27-06-2012):
http://wordfaqs.mvps.org/CombineXrefs.htm
===================================
Is there a way to make Word combine cross-references without repeating the label. That is, instead of having to write, “see Figure 5, Figure 6, and Figure 7,” can you write, “see Figures 5, 6, and 7” or “see Figures 5–7”?
Ordinarily, the field code for such a cross-reference would appear as something like:
{ REF _Ref218925266 \n \h }
Simply change this to:
{ REF _Ref218925266 \# 0x \n \h }
NB1: You got more than 9 figures in your text? Make sure you add 'x' after the zero! The \h can be omitted if you do not want hyperlinks. The \n indicates that the number is referenced and not the paragraph text.
NB2: Use SHIFT-F9 after selecting and 'greying' the field, to make the field codes visible
Auteur: Harry van der Pol
Laatst bijgewerkt:2016-12-16 15:09
Waar zit het drawing canvas in WORD?
"Insert" -> "Shapes" -> "New Drawing Canvas"
Auteur: Harry van der Pol
Laatst bijgewerkt:2012-07-02 15:28
Hoe maak een figuur meer transparant in WORD?
Under Picture Tools, on the Format tab, in the Adjust group, click Recolor.
Click Set Transparent Color, and then click the color in the picture or image that you want to make transparent.
Auteur: Harry van der Pol
Laatst bijgewerkt:2012-07-02 15:31
Kan ik de grootte van mijn Word of Powerpoint bestand verkleinen?
Ja, waarschijnlijk wel. Zie filmpje.
Auteur: Harry van der Pol
Laatst bijgewerkt:2016-02-11 13:30
WORD2010: Hoe voeg ik een deel van een Excel file toe aan een WORD document?
How to link to or embed an object from an Excel file in WORD
- Open both the Word document and the Excel worksheet that contain the data that you want to create a linked object or embedded object from.
- Switch to Excel, and then select the entire worksheet, a range of cells, or the chart that you want.
- Press CTRL+C.
- Switch to the Word document, and then click where you want the information to appear.
- On the Home tab, in the Clipboard group, click the arrow under Paste, and then click Paste Special.
- In the As list, select Microsoft Office Excel object.
- Click Paste to insert an embedded object, or click Paste link to insert a link to the object.
Auteur: Harry van der Pol
Laatst bijgewerkt:2016-12-01 16:56
WORD2010: Assign Shortcut code to macro's
WORD2010: Assign Shortcut code to macro's in Word 2010
- 'File, Options, Customize Ribbon'
- Somewhere at the bottom, a little bit left of the middle:
Keyboard shortcuts: 'Customize' - Select categorie 'Macros' in the left list
- Select the macro in the right list
- And the rest is obvious I guess.
See also: http://www.rondebruin.nl/qat.htm
Auteur: Harry van der Pol
Laatst bijgewerkt:2016-12-01 16:58
Problemen met nummering van paragrafen in WORD 2010?
WORD2010: Problemen met nummering van paragrafen in WORD2010?
Korte samenvatting:
- Maak paragraaf stylen zonder nummering
- Maak een nieuwe List Style
Alleen dan heb je een list stijl die je kan wijzigen. Zet hier alle zaken die te maken hebben met nummering e.d. (gebruik hiervoor ook de MORE knop in het menu nummering.) - Koppel in die list stijl de juiste paragraafstijl aan het juiste outline level nummer
Meer informatie:http://www.shaunakelly.com/word/numbering/numbering20072010.html
Auteur: Harry van der Pol
Laatst bijgewerkt:2014-12-12 10:14
WORD2010: Selecteren van objecten op de achtergrond
WORD2010: Selecteren van objecten op de achtergrond
I placed a picture in my word document and formatted to be behind the text.
Now I wish to alter the image, but can't select it to "bring it to front”.
You'll find Select Objects on the Home tab, in the Editing group, under Select.
Auteur: Harry van der Pol
Laatst bijgewerkt:2014-12-12 09:30
Hoe voorkom ik dat formules gemaakt in Word Equation Editor automatisch worden omgezet naar MathType? (En dan niet meer te wijzigen zijn met de standaard editor)
MathType en Microsoft Equation Editor los koppelen
- Ga naar start menu:<start> <Programs> <MathType 6> <Equation Conversion Manager>
- verplaats Microsoft Equation Editor naar het vak dat NIET automatisch wordt omgezet in MathType.
Auteur: Harry van der Pol
Laatst bijgewerkt:2014-12-12 09:26
Mark a section of text as a different language.
WORD2010:
Mark a section of text as a different language.
For example from Dutch to English
Is there a section of text in your document (or your whole document!) that isn’t “English (United States)” or another language. Well to make sure that your spelling and grammar checks in Word 2007 work well, you need to make sure that text is marked as the right language.
So how do you mark a section of text as a different language?
- Select the text
- Make sure you are on the “Review” tab of the ribbon
- Look for the “Proofing” group”
- Click “Set Language”
- Select your preferred language
Auteur: Harry van der Pol
Laatst bijgewerkt:2014-12-12 09:25